Skill: Knitting
Level: Basic knit skills required
Tools Required: UK Size 4mm Knitting Needles, 1 x 50g ball of yarn (I have used 50% Cotton/50% Acrylic suitable for this size needle), Knitting Needle (for sewing up and sewing in ends), Snippers/ Scissors
This pattern is a super easy starter! With all of my friends popping out little ones - this is the perfect use of my commuting time to make some cute little booties suitable for firstborns - 3 months. They make great presents and you can jazz them up by using fancy wools and embellishing with a sewn in ribbon tie - cute for a little girl!
If you are totally new to knitting and have never attempted a pattern on your own before - I have posted a link on the blog to a video for a tutorial to teach you the basics.
For this pattern, you will need to be able to cast on, knit stitch, purl stitch and cast off. Simples!
Pattern
Pattern Abbreviations: K= Knit Stitch, P= Purl Stitch, K""Tog. = Knit Stitches together (ie. K2Tog. = Knit two stitches together).
- Cast on 38 stitches *make sure to leave approx. 15cm of loose yarn before your slip knot for sewing up the bottom of the bootie
- Knit 12 rows
- K16, K2Tog., K2, K2Tog., K16, Count 36 Stitches
- K15, K2Tog., K2, K2Tog., K15, Count 34 Stitches
- K14, K2Tog., K2, K2Tog., K14, Count 32 Stitches
- K13, K2Tog., K2, K2Tog., K13, Count 30 Stitches
- K12, K2Tog., K2, K2Tog., K12, Count 28 Stitches
- K11, K2Tog., K2, K2Tog., K11, Count 26 Stitches
- K10, K2Tog., K2, K2Tog., K10, Count 24 Stitches
- K2,P2 to end of row,
- Repeat for total 12 rows,
- Cast off (24 stitches) *make sure to leave approx. 15cm of loose yarn before snipping the yarn from the ball - you need this to sew up the back of the bootie!
- Sew the bootie up along the bottom row and back of the bootie.
- Turn the bootie inside out and fold down the ribbed cuff
- Et voila! Time for bootie number 2...
The kit
Casting on
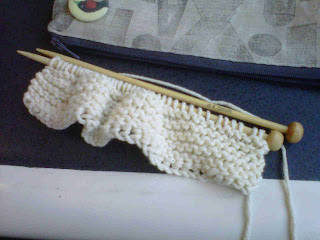
First 12 rows - knit stitch
Start of decreasing
Sewing up the pretty bootie
One down, one to go!
Crafty Hints...
# In a Blue Peter style "here's one I made earlier" type way - I like to add a little ribbon for the girly booties and package them up in a cute paper bag or a polythene bag with a cute sticker.
# If you want to make them even more exciting to open, I like to box mine up in a little take out box; you can find a free template for these online via the link below!
http://wrappedforlife.blogspot.co.uk/2010/12/new-baby-mini-take-out-boxes.html?zx=7ed21d4ecc49e647
# Chose your yarn wisely - You may be tempted to go for more natural than man made fibres but the high acrylic content gives the booties an elasticity in the yarn which makes it easier to get the boots onto the baby feet = Happy Mums! :)
# You can substitute the ribbed cuff for a plain cuff by replacing the last part of the pattern where you knit and purl your last 12 rows for 8 rows of plain knit. This is a more traditional looking bootie but is less easy to get on the baby feet so you need to take care with not making your tension too tight!
# If you are a knitting pro - why not jazz things up by substituting every second knit row with a purl row to create a horizontal rib effect?


No comments:
Post a Comment